

How-to1 min read·Updated Nov 2, 2026
Invite your team and assign roles
Add users, pick a role for each, and understand what the built-in roles can do.
Requires permission
agency.team.inviteEvery person who logs into the dashboard is a team member with exactly one role. Roles decide which sidebar items appear and which buttons work, so choose them deliberately.
- Go to Team and press Invite member.
- Enter the name, email and (optionally) WhatsApp number. Choose the preferred language — it controls the language of their invitation and all later notifications.
- Pick a role. Hover a role to see a summary of what it allows.
- Optionally link the member to a Staff profile (for payroll and leave) and set a department.
- Send. The invitee receives an email (and WhatsApp message if a number was given) with a link to set their password.
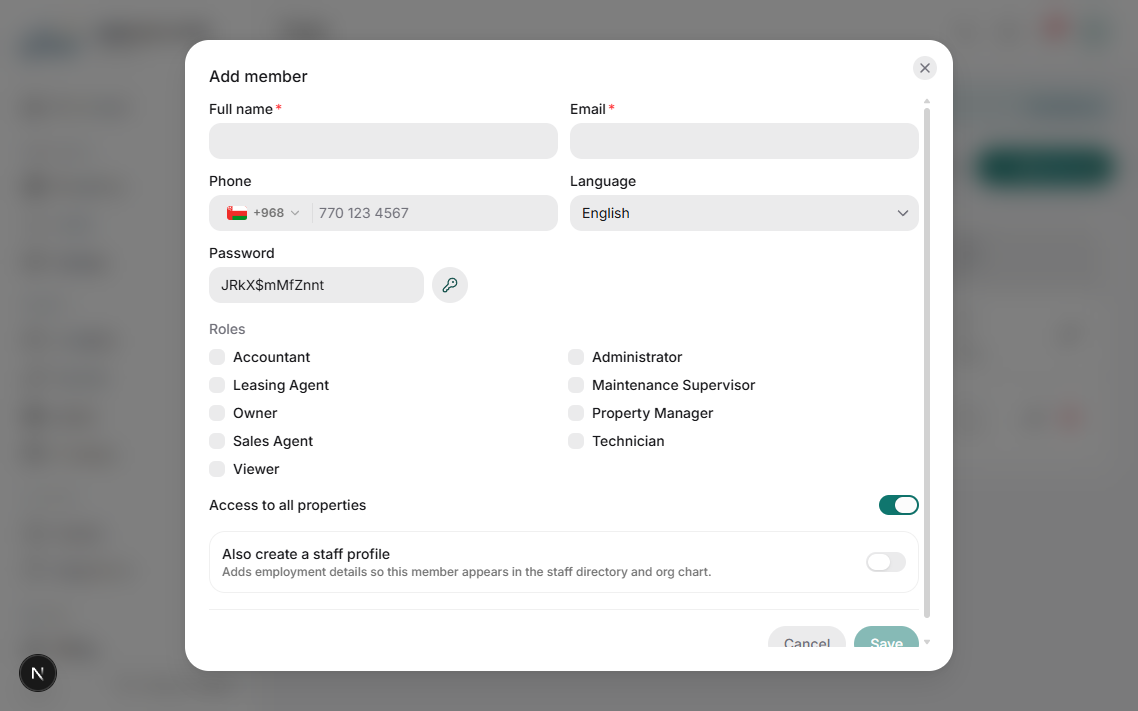
Built-in roles
| Role | Typical use |
|---|---|
| Owner | Full access including billing and plan. One per agency, cannot be deleted. |
| Administrator | Everything except changing the plan. |
| Property manager | Portfolio, contacts, leases, maintenance; no payroll or settings. |
| Accountant | Invoices, payments, cheques, accounts, expenses, payroll; read-only portfolio. |
| Leasing agent | Leads, viewings, contacts and own leases. |
| Sales agent | Leads, reservations, own sale contracts and commissions. |
| Technician | Only maintenance requests and tasks assigned to them. |
| Viewer | Read-only everywhere. |
Your plan includes a number of team seats. The counter on the Team page shows how many are left; extra seats are billed as overage — see Usage limits and overage.
Need something between two roles? Create a custom role by starting from a built-in one and toggling individual permissions.
Was this article helpful?
Related articles
Roles and permissions explainedConceptHow access is gated: modules, actions, 'own vs all' scopes, and the built-in roles.1 min readCreate a custom roleHow-toBuild a role with exactly the permissions a job needs, then assign it to users.1 min readStaff profiles and HR recordsHow-toProfessionalKeep employment details, documents, salary structure and leave allowances on each staff member.1 min read